5 Creative Vertical Garden Ideas for Small Yards

5 Creative Vertical Garden Ideas for Small Yards

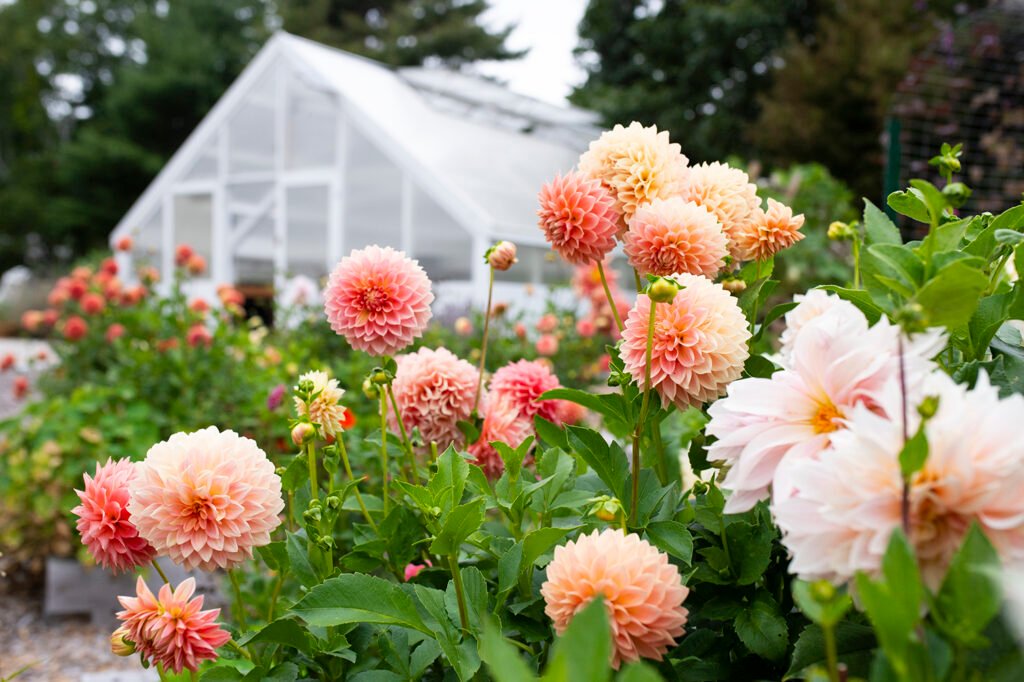
Maximizing green space in small yards can be a challenge, but vertical gardening offers a perfect solution. By growing plants upward rather than outward, vertical gardens save space, add aesthetic appeal, and improve biodiversity. They are ideal for urban homes, small patios, balconies, or any area where ground space is limited. Vertical gardening can also enhance air quality, provide privacy, and create stunning focal points in outdoor spaces. This guide explores five creative vertical garden ideas that transform small yards into lush, vibrant retreats while making efficient use of limited space.


Why Choose a Vertical Garden for Small Yards?

Before diving into specific ideas, it’s essential to understand the benefits of vertical gardening:

  1. Space Efficiency: Utilizes walls, fences, and vertical structures, freeing up floor space.
  2. Aesthetic Appeal: Adds layers, textures, and color to otherwise plain walls.
  3. Improved Air Quality: Plants filter pollutants and release oxygen, making your yard fresher.
  4. Easy Maintenance: Elevating plants can reduce pests and make watering simpler.
  5. Enhanced Privacy: Tall vertical gardens can serve as natural screens or dividers.
  6. Accessibility: Plants at eye level are easier to maintain and harvest in kitchen gardens.

Vertical gardening allows small yards to feel more expansive and lush, combining functionality with beauty.


1. Living Wall or Green Wall

Living walls are one of the most striking ways to create vertical gardens. They consist of plants grown in vertically stacked panels, pockets, or modular structures attached to walls or fences.

How to Create a Living Wall:

  • Structure: Use pre-made panels, wooden pallets, or custom shelves to support plants.
  • Plant Selection: Choose lightweight, low-maintenance plants like ferns, ivy, pothos, or succulents.
  • Irrigation: Install a drip irrigation system or manually water from the top, ensuring all plants receive adequate moisture.
  • Maintenance: Prune regularly to maintain shape, remove dead foliage, and promote healthy growth.

Benefits: Living walls provide a lush, green backdrop, absorb noise, and improve air quality, making small yards feel vibrant and peaceful.


2. Vertical Planters Using Pallets

Wooden pallets are a budget-friendly and versatile way to create vertical gardens. They can be leaned against a wall, mounted, or hung.

Steps to Build a Pallet Vertical Garden:

  • Preparation: Sand the pallet to remove rough edges and coat with a protective sealant.
  • Planting: Fill the horizontal slats with soil and plant herbs, flowers, or small vegetables.
  • Placement: Position the pallet in a sunny area for optimal growth.
  • Watering: Water carefully, starting from the top, letting water trickle down to lower plants.

Plant Ideas: Strawberries, lettuce, basil, mint, marigolds, or trailing vines like ivy.

Benefits: Pallet gardens are sustainable, customizable, and ideal for small spaces with limited floor area.


3. Hanging Planters and Tiered Vertical Pots

Hanging planters and tiered pots take advantage of vertical space by suspending plants at different heights. This approach works well for balconies, fences, and patio walls.

How to Implement:

  • Hanging Planters: Use wall hooks, ceilings, or pergolas to hang pots at varying heights.
  • Tiered Pots: Stack planters in a staircase-like arrangement or use a plant stand to create levels.
  • Plant Selection: Choose trailing plants like pothos, ferns, or petunias for hanging pots; bushy plants like herbs for tiered pots.
  • Maintenance: Ensure each layer receives adequate water and sunlight; rotate pots for even growth.

Benefits: Adds dynamic layers, maximizes small spaces, and allows for creative arrangements with colors and textures.


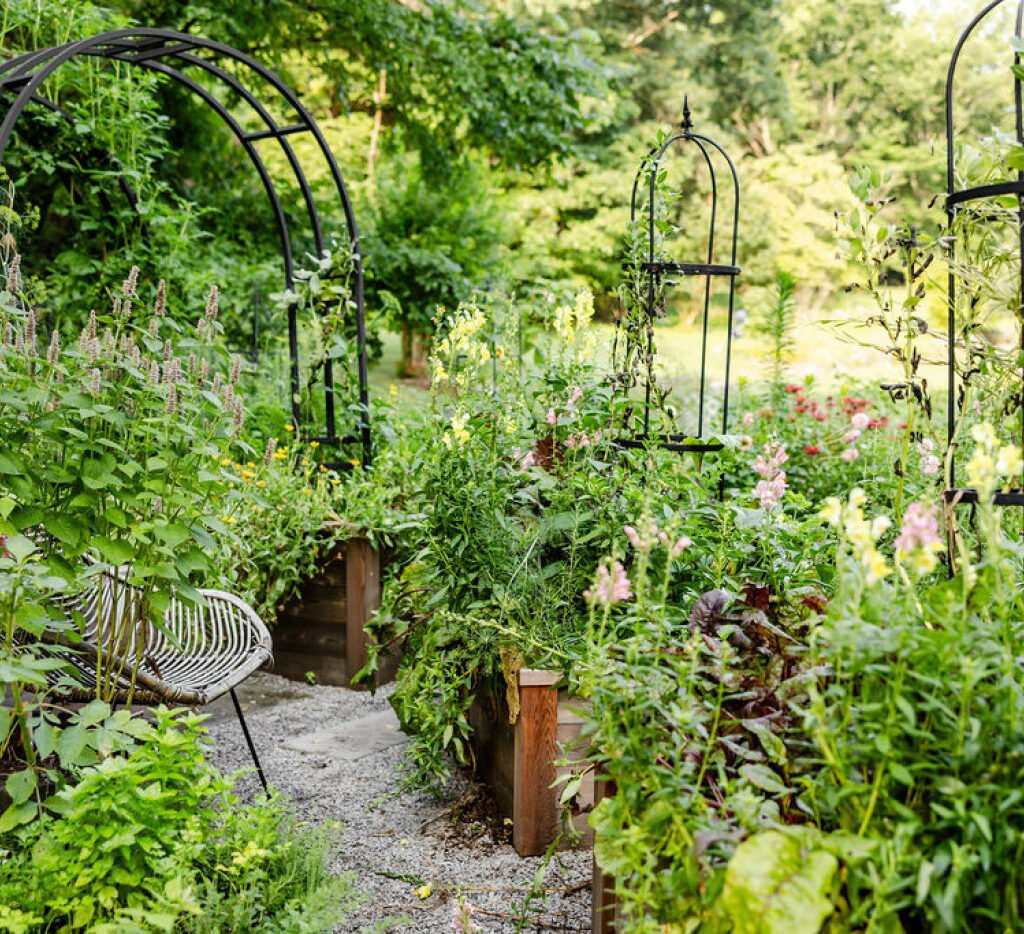
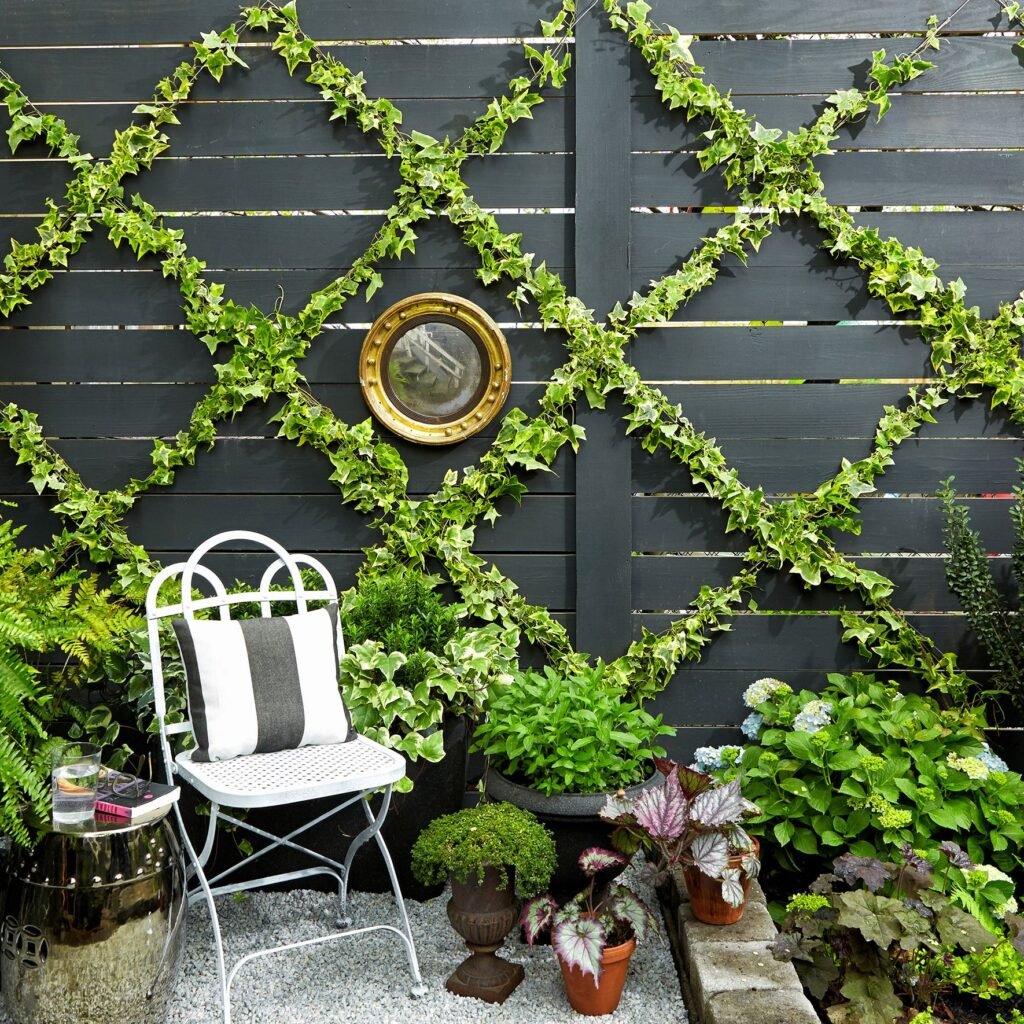
4. Trellises and Climbing Plants

Using trellises with climbing plants is a classic yet highly effective vertical garden method. Trellises can be made from wood, metal, or even rope structures.

Steps for a Trellis Garden:

  • Placement: Position the trellis against a wall, fence, or free-standing in the yard.
  • Plant Selection: Choose climbing plants like clematis, jasmine, sweet peas, morning glory, or climbing roses.
  • Training Plants: Tie young shoots gently to the trellis as they grow; prune to encourage bushier growth.
  • Support & Maintenance: Ensure the trellis is sturdy and monitor plants for pests or diseases.

Benefits: Trellises not only save space but also create privacy screens, fragrant blooms, and lush greenery in small yards.


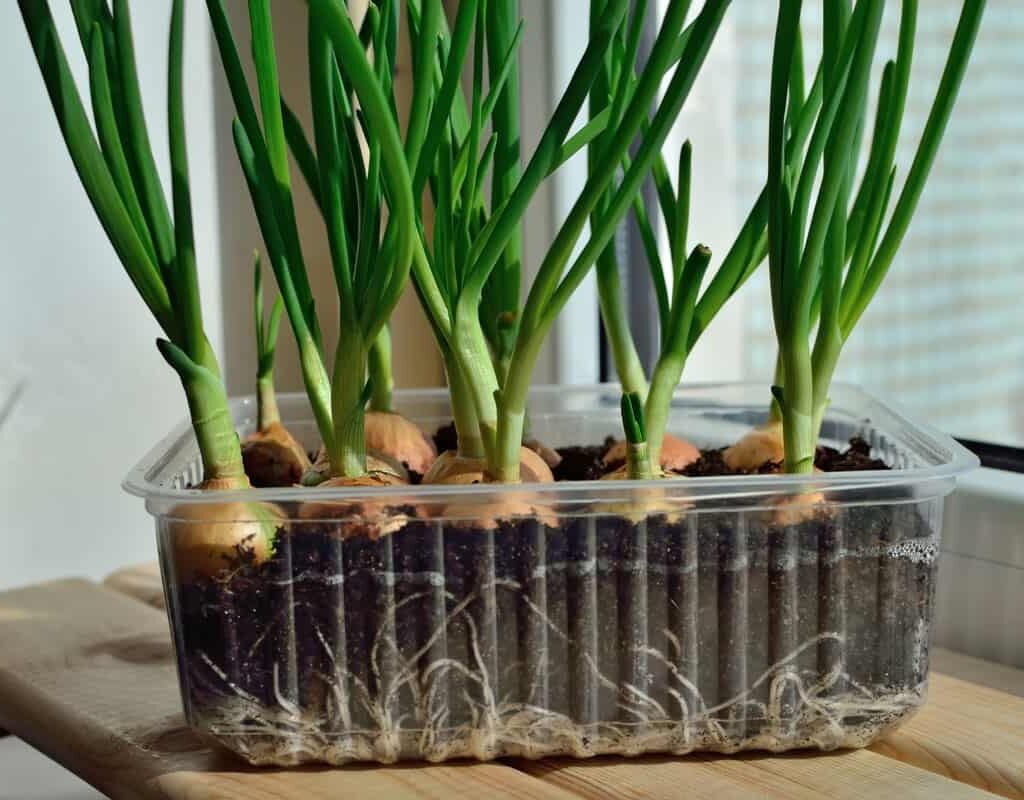
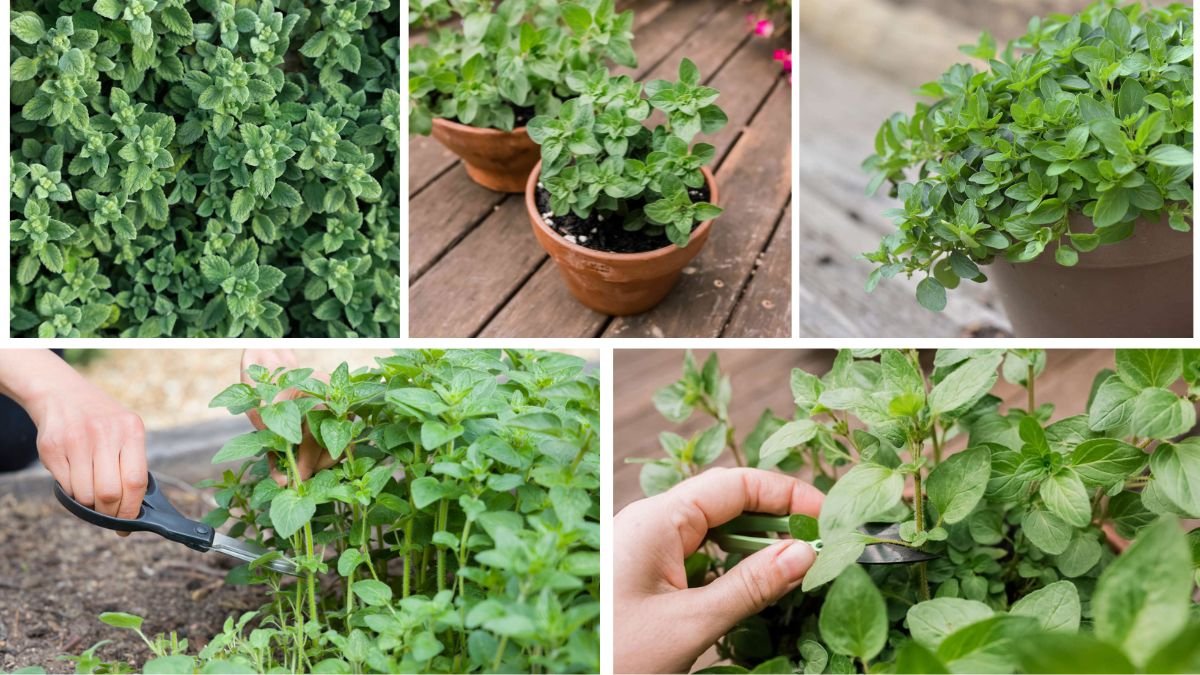
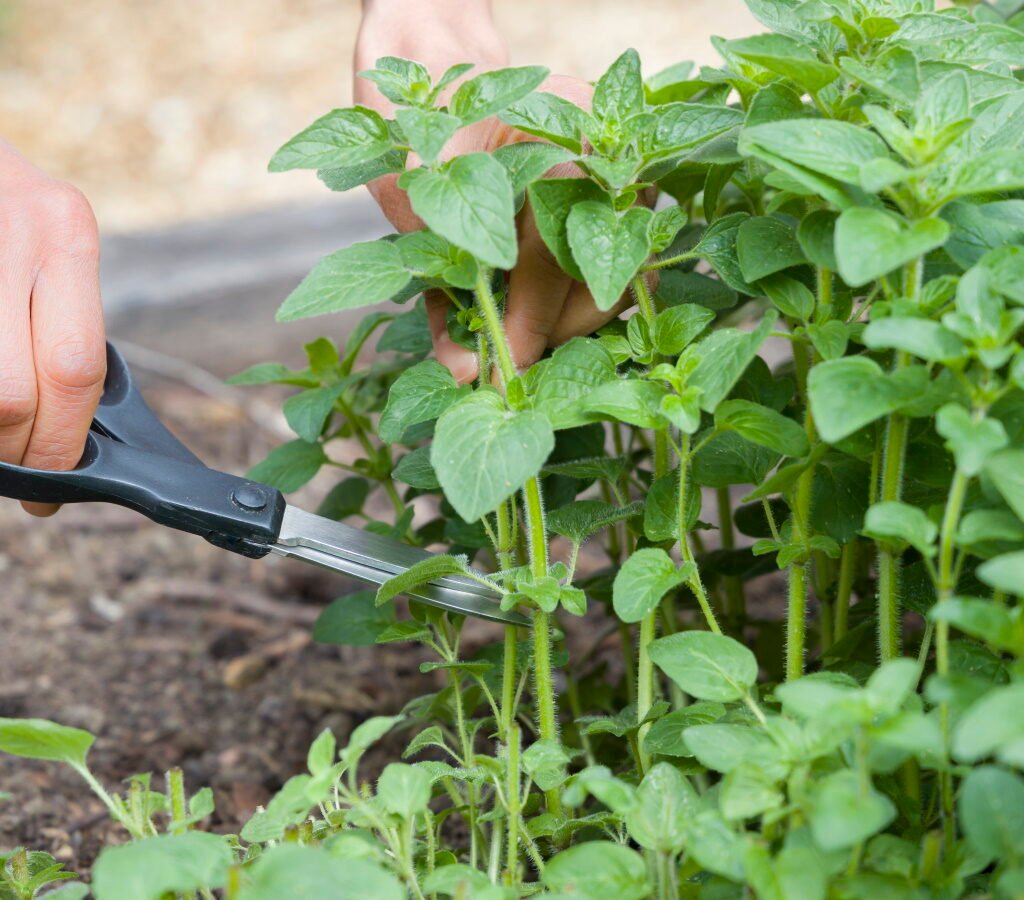
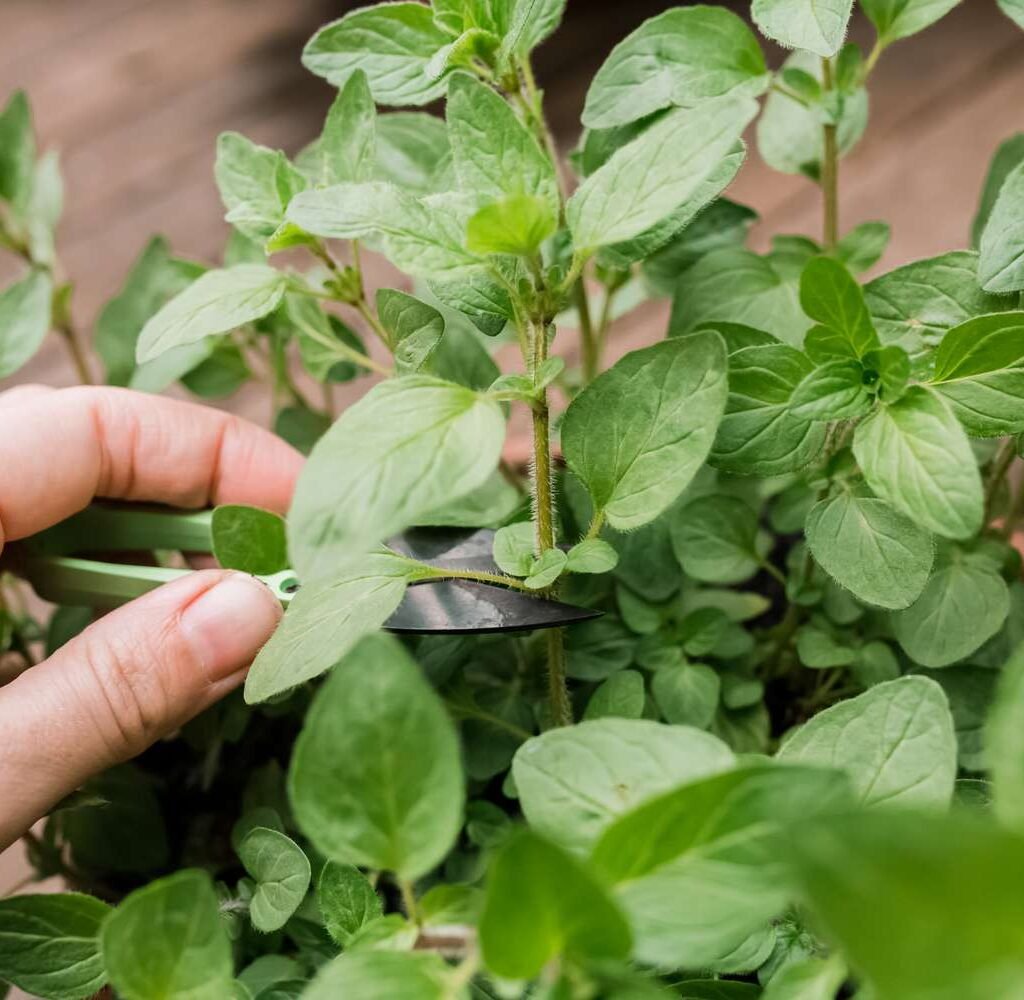
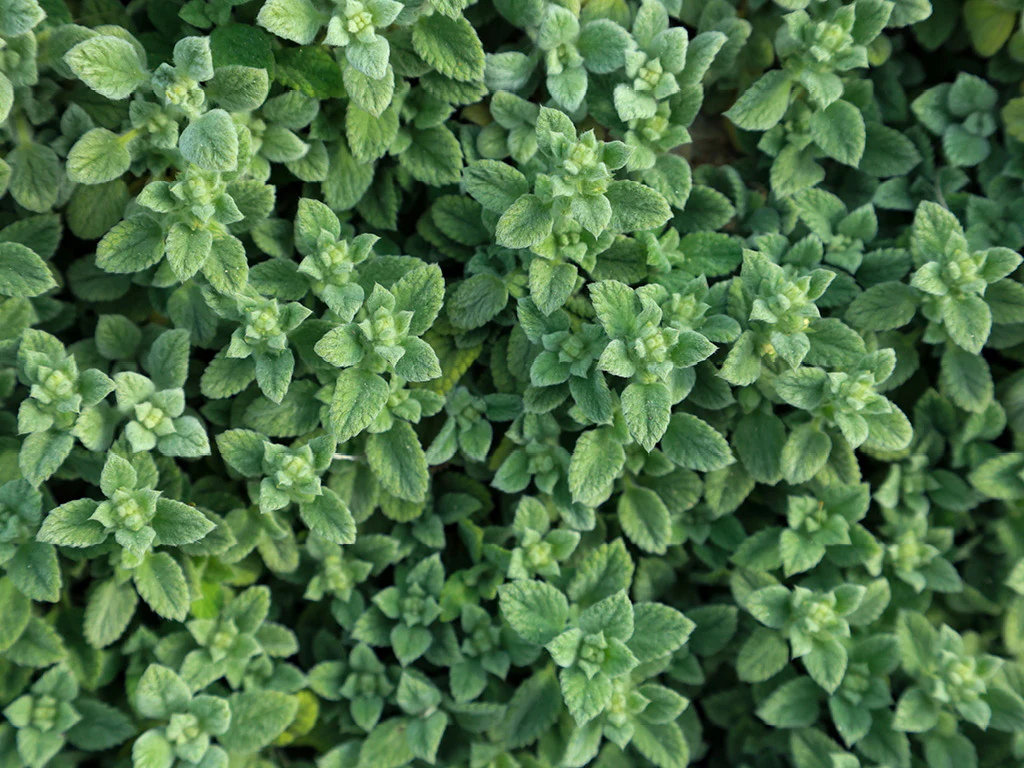
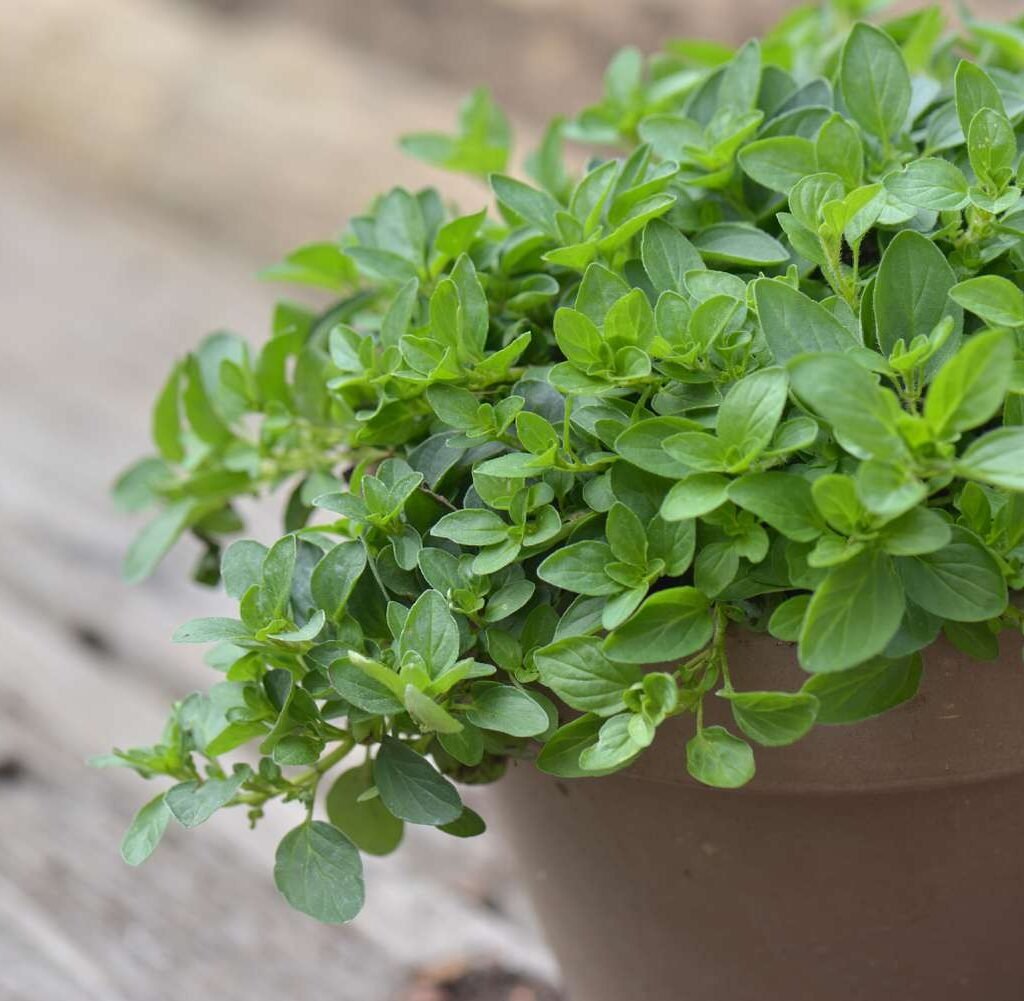
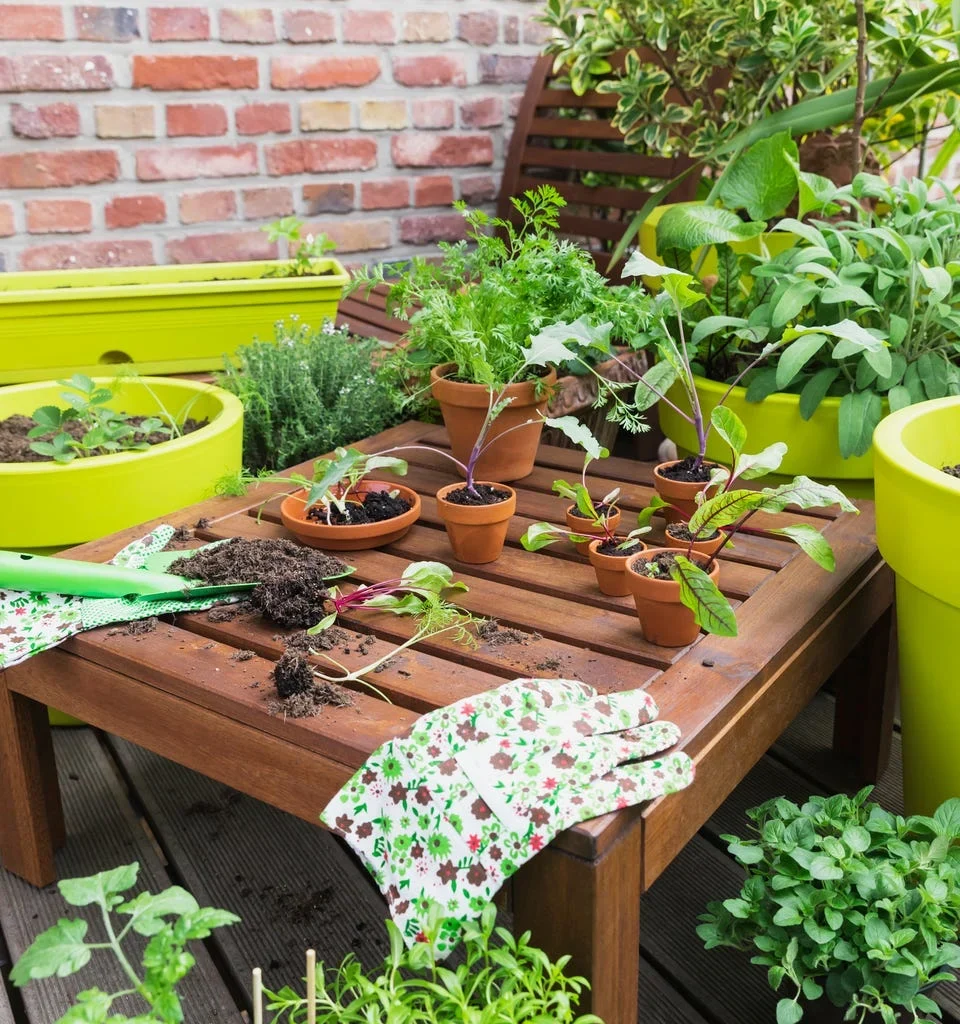
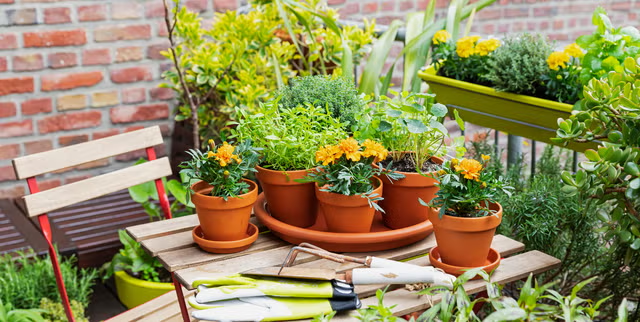
5. Vertical Herb Gardens

A vertical herb garden is perfect for small yards, patios, or balconies, combining practicality with visual appeal. Fresh herbs at arm’s reach can enhance cooking and reduce trips to the grocery store.

How to Set Up:

  • Structure: Use pocket planters, hanging shoe organizers, or tiered shelves.
  • Plant Selection: Easy-to-grow herbs like basil, thyme, mint, oregano, rosemary, and parsley.
  • Sunlight: Most herbs need 6–8 hours of sunlight; place the garden near a sunny window or wall.
  • Watering: Ensure consistent moisture, but allow soil to dry slightly between waterings.

Benefits: Vertical herb gardens are functional, space-saving, and provide fresh ingredients while adding greenery to small outdoor areas.


Tips for Maintaining a Vertical Garden

To ensure your vertical garden thrives, follow these key tips:

  1. Choose Appropriate Plants: Select species suited to vertical growth, indoor or outdoor lighting, and your climate.
  2. Use Quality Soil: Lightweight, well-draining soil prevents root rot and supports healthy growth.
  3. Water Wisely: Vertical gardens dry out faster; ensure consistent watering, especially for hanging or wall-mounted gardens.
  4. Fertilize Regularly: Apply balanced fertilizer periodically to maintain plant health and encourage flowering.
  5. Prune and Deadhead: Remove dead or overgrown foliage to keep plants healthy and visually appealing.
  6. Monitor for Pests: Inspect plants regularly for aphids, mites, or fungal infections; treat promptly.
  7. Rotate Plants if Possible: Some vertical setups benefit from rotation to ensure even sunlight exposure.
  8. Plan for Growth: Choose structures and plant spacing that allow for expansion and maturity.

Following these maintenance tips ensures your vertical garden stays vibrant, productive, and visually stunning.


Creative Ideas to Enhance Your Vertical Garden

  • Color Themes: Use flowers and foliage in coordinated colors for an eye-catching display.
  • Mixed Materials: Combine wood, metal, and recycled materials for a unique garden design.
  • Integrated Lighting: Add solar or LED lights to highlight the vertical garden at night.
  • Water Features: Incorporate small fountains or drip systems for aesthetic appeal and plant hydration.
  • Seasonal Rotation: Change plants seasonally for continuous color and interest.

These creative touches transform a functional vertical garden into a centerpiece for your small yard.


Benefits of Vertical Gardens in Small Yards

  • Maximizes Limited Space: Provides greenery without consuming horizontal space.
  • Enhances Property Aesthetics: Adds texture, color, and depth to small outdoor areas.
  • Improves Microclimate: Plants provide cooling and improve air quality.
  • Encourages Sustainable Living: Grow your own herbs, vegetables, and flowers sustainably.
  • Promotes Mental Well-being: Gardening and greenery contribute to relaxation and stress relief.

Vertical gardens offer both functional and emotional benefits, making them an excellent choice for urban gardeners.


Conclusion

Creating a vertical garden in a small yard is a practical and visually appealing way to maximize space while adding life, color, and function to your outdoor area. From living walls and pallet gardens to hanging planters, trellises, and vertical herb setups, there are numerous creative options to suit any space, budget, or style.

By carefully selecting plants, using quality soil, ensuring proper light and water, and adding creative touches, even the smallest yards can be transformed into lush, green retreats. Vertical gardening not only enhances the beauty of your home but also provides functional benefits like fresh herbs, cut flowers, and improved air quality. With consistent care and creativity, your small yard can become a vertical paradise filled with color, texture, and life.

Beginner Tips for Growing Succulents Indoors

Beginner Tips for Growing Succulents Indoors

Succulents have surged in popularity among indoor gardeners, and for good reason. With their fleshy, water-storing leaves and unique shapes, succulents are visually striking, low-maintenance plants that can thrive in a variety of indoor spaces. These hardy plants are ideal for beginners due to their adaptability and tolerance for neglect, making them perfect for apartments, offices, and homes alike. Beyond their aesthetic appeal, succulents also improve air quality and contribute to a calming indoor environment. This comprehensive guide provides beginner-friendly tips for growing succulents indoors, covering selection, care, watering, lighting, soil, and common issues.


Why Grow Succulents Indoors?

Growing succulents indoors offers multiple advantages:

  1. Low Maintenance: Succulents require minimal watering and attention.
  2. Space-Friendly: Many varieties thrive in small containers, perfect for apartments.
  3. Aesthetic Appeal: Their diverse shapes, colors, and textures enhance home décor.
  4. Air Quality: Succulents can help purify indoor air by absorbing pollutants.
  5. Stress Reduction: Indoor plants, including succulents, promote relaxation and well-being.
  6. Propagation Opportunities: Easy to propagate, offering an inexpensive way to expand your indoor garden.

With these benefits, succulents are an ideal choice for beginners seeking beauty and ease in indoor gardening.


Step 1: Choosing the Right Succulent Varieties

Selecting the right succulent species is crucial for indoor success. Consider:

  • Echeveria: Rosette-shaped, colorful leaves, ideal for sunny windowsills.
  • Haworthia: Small, hardy, and low-light tolerant; perfect for desks or shelves.
  • Jade Plant (Crassula ovata): Thick, glossy leaves; grows slowly indoors.
  • Aloe Vera: Useful medicinal plant with minimal care requirements.
  • Sedum: Low-growing, trailing varieties suitable for hanging planters.
  • Gasteria: Hardy, tolerant of low light, and attractive foliage.

Choose species based on available light, indoor space, and your aesthetic preferences.


Step 2: Selecting the Right Container

The container plays a crucial role in succulent health:

  • Drainage: Always choose pots with drainage holes to prevent root rot.
  • Material: Terracotta and clay pots are breathable and ideal for succulents.
  • Size: The pot should accommodate the plant’s root system with room for growth.
  • Aesthetic: Match the container style to your indoor décor for a pleasing look.

Proper container selection ensures that succulents thrive and remain healthy indoors.


Step 3: Using the Right Soil

Succulents require well-draining soil to prevent waterlogged roots:

  • Cactus or Succulent Mix: Pre-packaged mixes provide excellent drainage.
  • DIY Option: Mix 2 parts potting soil, 1 part coarse sand, and 1 part perlite.
  • pH Levels: Neutral to slightly acidic (6.0–7.0) is ideal.

Well-draining soil is essential to prevent root rot and promote strong, healthy growth.


Step 4: Providing Adequate Light

Light is one of the most critical factors for indoor succulents:

  • Bright, Indirect Sunlight: Most succulents need 4–6 hours of light per day.
  • South- or East-Facing Windows: Ideal locations to provide sufficient sunlight.
  • Supplemental Lighting: Use LED grow lights in low-light areas or during winter.
  • Rotation: Rotate pots regularly to ensure even growth and prevent leaning.

Adequate light keeps succulents compact, colorful, and healthy.


Step 5: Watering Succulents Properly

Watering is the most common mistake made by beginner succulent growers:

  • “Soak and Dry” Method: Water thoroughly, then allow the soil to dry completely before watering again.
  • Frequency: Usually once every 2–3 weeks, but adjust based on indoor temperature and season.
  • Avoid Overwatering: Too much water causes root rot and yellowing leaves.
  • Signs of Underwatering: Wrinkled or shriveled leaves indicate the plant needs water.

Mastering proper watering techniques ensures healthy growth and longevity of your succulents.


Step 6: Temperature and Humidity

Indoor succulents prefer moderate temperatures and low humidity:

  • Temperature Range: 60–80°F (15–27°C) during the day; slightly cooler at night.
  • Avoid Drafts: Keep plants away from cold drafts, radiators, and heating vents.
  • Humidity Levels: Low humidity is ideal, similar to their native environments.

Maintaining optimal temperature and humidity conditions helps prevent stress and disease.


Step 7: Fertilizing Indoor Succulents

Succulents are not heavy feeders, but occasional fertilization promotes healthy growth:

  • Fertilizer Type: Use a balanced, water-soluble fertilizer diluted to half strength.
  • Frequency: Fertilize once a month during the growing season (spring and summer).
  • Avoid Over-Fertilization: Excess nutrients can lead to leggy, weak growth.

Fertilizing correctly enhances foliage color and overall plant vigor.


Step 8: Repotting Succulents

Repotting is essential as succulents grow or when soil becomes depleted:

  • Timing: Repot every 1–2 years, preferably during spring.
  • Method: Gently remove the plant, trim dead roots, and place in fresh, well-draining soil.
  • Pot Size: Choose a slightly larger container to accommodate root expansion.
  • Aftercare: Allow plants to rest for a few days before watering to prevent stress.

Regular repotting ensures healthy root development and continued growth.


Step 9: Propagating Succulents

Succulents are easy to propagate, making them ideal for expanding your indoor garden:

  • Leaf Cuttings: Remove a healthy leaf, let it callus for a few days, then place on well-draining soil.
  • Stem Cuttings: Cut a stem, let it dry, then plant in soil to root.
  • Offsets: Many succulents produce baby plants that can be separated and repotted.

Propagation is a cost-effective way to multiply your collection and experiment with new arrangements.


Step 10: Common Issues and Troubleshooting

Indoor succulents may face some challenges, but most can be managed easily:

  • Etiolation (Stretching): Caused by insufficient light; move to a brighter location.
  • Root Rot: Resulting from overwatering; remove affected roots and repot in dry soil.
  • Pests: Mealybugs and spider mites; treat with neem oil or insecticidal soap.
  • Leaf Drop: Can occur due to overwatering, underwatering, or sudden temperature changes.

Monitoring plants regularly and addressing issues early ensures healthy, vibrant succulents.


Tips for Beginner Success

  1. Start with hardy, low-maintenance varieties like Echeveria, Haworthia, or Jade.
  2. Use well-draining soil and pots with drainage holes.
  3. Provide bright, indirect sunlight and rotate plants regularly.
  4. Water sparingly and follow the “soak and dry” method.
  5. Maintain moderate temperatures and low humidity.
  6. Fertilize lightly during the growing season.
  7. Repot every 1–2 years to refresh soil and accommodate growth.
  8. Propagate through leaves, stems, or offsets to expand your collection.
  9. Keep an eye out for pests, diseases, and signs of stress.
  10. Enjoy experimenting with creative indoor arrangements and decorative pots.

Following these steps will help you build a thriving, beautiful indoor succulent garden.


Conclusion

Indoor succulents are perfect for beginners seeking low-maintenance, visually appealing plants. With their wide range of shapes, colors, and sizes, succulents enhance any indoor space while offering stress relief, improved air quality, and propagation opportunities. By selecting suitable varieties, using proper soil, providing adequate light, and mastering watering techniques, even first-time gardeners can enjoy healthy, thriving succulents.

Caring for succulents indoors requires attention to detail, but it is highly rewarding. From propagation to creative container arrangements, these resilient plants offer endless possibilities for indoor gardening. Start your succulent journey today and enjoy the beauty, texture, and tranquility that these remarkable plants bring to your home.

How to Grow Dahlias for Stunning Summer Flowers

How to Grow Dahlias for Stunning Summer Flowers

Dahlias (Dahlia spp.) are among the most vibrant and diverse flowering plants, prized for their striking blooms and a wide range of colors, shapes, and sizes. Perfect for summer gardens, dahlias can create eye-catching flower beds, borders, and cut-flower displays. Their spectacular blooms attract pollinators like bees and butterflies, enhancing the overall biodiversity of your garden. With proper planning, planting, and care, you can cultivate dahlias that bloom profusely throughout the summer season. This comprehensive guide will provide step-by-step instructions for growing dahlias successfully, from choosing the right variety to harvesting blooms.


Why Grow Dahlias at Home?

Growing dahlias at home offers several benefits:

  1. Show-Stopping Blooms: Dahlias come in countless colors and sizes, from tiny pompons to massive dinner-plate varieties.
  2. Long Blooming Season: With proper care, dahlias bloom from mid-summer until the first frost.
  3. Attracts Pollinators: Their vibrant flowers attract bees, butterflies, and other beneficial insects.
  4. Cut-Flower Potential: Dahlias make excellent bouquets for home decoration or gifts.
  5. Variety and Flexibility: Dahlias thrive in garden beds, containers, or even hanging baskets.
  6. Low Maintenance: With the right soil, sunlight, and watering, dahlias are relatively easy to grow.

These features make dahlias a favorite choice for both novice and experienced gardeners.


Step 1: Choosing the Right Dahlia Variety

Dahlias come in a wide range of forms and sizes. Selecting the right variety depends on your garden space and design goals:

  • Dwarf Varieties: Grow up to 12–18 inches tall, ideal for container gardening or small beds.
  • Medium Varieties: Reach 2–4 feet, perfect for flower borders and mixed beds.
  • Giant Varieties: Can reach 5–6 feet tall with large blooms, ideal for dramatic focal points.
  • Decorative Dahlias: Large, showy blooms with layered petals.
  • Cactus Dahlias: Narrow, spiky petals with a unique appearance.
  • Pompon Dahlias: Small, rounded flowers, perfect for cut arrangements.

Choose varieties based on bloom size, height, color, and the overall aesthetic you want for your garden.


Step 2: Selecting the Ideal Location

Dahlias thrive in sunny, well-drained locations:

  • Sunlight: At least 6–8 hours of direct sunlight per day. Full sun promotes stronger stems and more blooms.
  • Air Circulation: Plant dahlias in areas with good airflow to prevent fungal diseases.
  • Soil: Rich, well-draining soil with a pH of 6.0–7.5 is ideal.
  • Spacing: Maintain 18–36 inches between plants depending on variety size to prevent overcrowding.

The right location is crucial for healthy growth, abundant flowering, and disease prevention.


Step 3: Preparing the Soil

Healthy, fertile soil ensures strong dahlia growth:

  • Organic Matter: Mix compost, well-rotted manure, or leaf mold into the soil.
  • Soil Drainage: Dahlias are prone to rot in waterlogged soil; raised beds or sandy loam work best.
  • Fertilization: Add a balanced fertilizer or bone meal before planting to support root and flower development.
  • Soil Loosening: Loosen soil to a depth of 12–18 inches to accommodate tuber growth.

Proper soil preparation leads to stronger tubers, lush foliage, and vibrant flowers.


Step 4: Planting Dahlias

Dahlias are grown from tubers or transplants:

Using Tubers

  • Plant tubers after the last frost date in spring.
  • Dig a hole 6–8 inches deep and place the tuber horizontally with the growing points (eyes) facing up.
  • Cover with 2–3 inches of soil initially; fill the rest as sprouts emerge.

Using Transplants

  • Start seeds indoors 6–8 weeks before the last frost.
  • Transplant seedlings into the garden after the danger of frost has passed.

Planting at the right time ensures strong, healthy plants that bloom abundantly in summer.


Step 5: Watering Dahlias

Dahlias require consistent moisture, especially during growth and flowering:

  • Frequency: Water deeply 2–3 times per week depending on rainfall and soil type.
  • Method: Water at the base to avoid wetting foliage, which can lead to fungal diseases.
  • Mulching: Apply a 2–3 inch layer of organic mulch to retain soil moisture, suppress weeds, and regulate temperature.

Proper watering ensures vigorous growth, strong stems, and prolonged bloom periods.


Step 6: Fertilizing Dahlias

Dahlias are heavy feeders and benefit from regular nutrition:

  • Balanced Fertilizer: Use a low-nitrogen, high-phosphorus fertilizer to promote blooms rather than excessive foliage.
  • Frequency: Fertilize every 3–4 weeks during the growing season.
  • Organic Options: Compost tea or fish emulsion can enhance soil fertility naturally.

Adequate fertilization supports abundant flowering and overall plant health.


Step 7: Staking and Support

Tall dahlia varieties often need support to prevent breakage:

  • Staking: Insert stakes 6–8 inches into the soil at planting time.
  • Tying: Use soft ties to gently secure stems as plants grow.
  • Cages: For bushy varieties, consider tomato cages or trellis supports.

Supporting plants prevents stem damage from wind, heavy blooms, or rain.


Step 8: Pruning and Deadheading

Regular pruning enhances plant structure and prolongs flowering:

  • Pinching Tips: Pinch growing tips early in the season to encourage bushier growth.
  • Deadheading: Remove spent flowers regularly to stimulate new blooms.
  • Leaf Care: Remove yellow or damaged leaves to maintain plant health and appearance.

Pruning and deadheading ensure more flowers and a tidier garden display.


Step 9: Controlling Pests and Diseases

Common pests and diseases affecting dahlias include:

  • Aphids: Spray with insecticidal soap or neem oil.
  • Slugs and Snails: Use barriers, traps, or organic slug pellets.
  • Powdery Mildew: Improve airflow, avoid overhead watering, and apply fungicides if needed.
  • Spider Mites: Increase humidity and remove heavily infested leaves.

Early detection and regular monitoring prevent severe infestations and plant damage.


Step 10: Harvesting and Enjoying Dahlias

  • Cutting Flowers: Harvest in the morning when blooms are partially open.
  • Stem Care: Use sharp scissors or garden shears, cutting stems at a 45-degree angle.
  • Vase Life: Place cut flowers in fresh water and change water regularly for long-lasting bouquets.
  • Tuber Care: After the first frost, cut back foliage and dig up tubers for winter storage in cool, dry conditions.

Harvesting regularly encourages more blooms and allows you to enjoy the vibrant beauty indoors.


Benefits of Growing Dahlias

  • Stunning Visual Impact: Ideal for flower beds, borders, and bouquets.
  • Attracts Pollinators: Supports garden biodiversity.
  • Versatile Use: Suitable for cutting gardens, container gardening, and landscaping.
  • Long Bloom Season: Flowers continuously throughout summer with proper care.
  • Easy Maintenance: Requires moderate care once established.

Dahlias provide both aesthetic appeal and practical benefits for any garden.


Tips for Thriving Dahlias

  1. Plant in full sun with well-draining, fertile soil.
  2. Water consistently but avoid waterlogging.
  3. Fertilize with low-nitrogen, bloom-promoting nutrients.
  4. Stake tall varieties to prevent stem breakage.
  5. Pinch tips early to encourage bushier plants.
  6. Deadhead spent blooms regularly for continuous flowering.
  7. Mulch to retain moisture and suppress weeds.
  8. Monitor and manage pests and diseases promptly.
  9. Practice crop rotation to prevent soil-borne issues.
  10. Dig up tubers for winter storage in colder climates.

Following these steps ensures strong, vibrant plants that produce stunning summer blooms.


Conclusion

Growing dahlias at home is a rewarding endeavor for gardeners seeking color, fragrance, and visual appeal in their summer gardens. By selecting the right variety, preparing nutrient-rich soil, providing adequate sunlight and water, and practicing proper staking, pruning, and pest control, you can cultivate dahlias that flourish from mid-summer until the first frost.

Dahlias not only brighten garden spaces with their spectacular blooms but also attract beneficial pollinators, making your garden more lively and diverse. Whether used for ornamental beds, cut flowers, or container displays, dahlias are a versatile and reliable choice for gardeners of all skill levels. Start planting dahlias today, and enjoy the beauty, color, and joy they bring to your summer garden.

Step-by-Step Guide to Growing Onions at Home

Step-by-Step Guide to Growing Onions at Home

Onions (Allium cepa) are one of the most essential and widely used vegetables in kitchens around the world. With their pungent flavor and versatile culinary applications, onions form the foundation of countless recipes, from soups and sauces to salads and stir-fries. Beyond their culinary appeal, onions are rich in antioxidants, vitamins, and compounds that support heart health and immunity. Growing onions at home is both rewarding and practical, providing a continuous supply of fresh, flavorful bulbs. With the right approach, even beginner gardeners can successfully cultivate onions in garden beds, raised beds, or containers. This step-by-step guide will help you grow, care for, and harvest onions at home.


Why Grow Onions at Home?

Homegrown onions come with numerous advantages:

  1. Freshness and Flavor: Freshly harvested onions are more flavorful than store-bought varieties.
  2. Cost Savings: Growing your own onions reduces grocery expenses.
  3. Control Over Quality: You can grow organic onions without pesticides or synthetic fertilizers.
  4. Variety Options: Home gardening allows you to grow different onion types, including red, yellow, white, and green onions.
  5. Health Benefits: Onions are rich in vitamins C, B6, and folate, and have compounds that promote heart health and immunity.

Growing onions at home ensures a steady, reliable supply while adding satisfaction and value to your garden.


Step 1: Choosing the Right Onion Variety

Selecting the right variety is essential for successful growth:

  • Short-Day Onions: Require 10–12 hours of daylight; ideal for southern regions.
  • Long-Day Onions: Require 14–16 hours of daylight; suitable for northern climates.
  • Intermediate-Day Onions: Suitable for regions with moderate daylight hours.
  • Red Onions: Sweet or pungent flavor, perfect for salads and cooking.
  • Yellow Onions: Versatile, ideal for cooking and long-term storage.
  • White Onions: Mild flavor, commonly used in salsas and salads.
  • Green/Scallion Onions: Harvested young for tender green tops.

Choose a variety based on your climate, daylight availability, and culinary needs.


Step 2: Selecting the Ideal Location

Onions thrive in sunny, well-drained locations:

  • Sunlight: At least 6–8 hours of direct sunlight per day.
  • Soil: Loose, fertile, well-draining soil enriched with organic matter.
  • Spacing: Ensure enough space for bulbs to develop—4–6 inches apart in rows 12–18 inches apart.

A sunny location with proper soil ensures healthy growth, large bulbs, and reduced pest problems.


Step 3: Preparing the Soil

Proper soil preparation is crucial for strong onion growth:

  • Soil pH: Slightly acidic to neutral (6.0–7.0).
  • Organic Matter: Add compost or well-rotted manure to improve fertility.
  • Drainage: Onions do not tolerate waterlogged soil; raised beds or sandy soil work best.
  • Soil Loosening: Loosen soil 8–10 inches deep to allow bulb expansion and healthy root development.

Well-prepared soil promotes uniform growth and high-quality onions.


Step 4: Planting Onions

Onions can be grown from seeds, sets, or transplants:

From Seeds

  • Sow seeds ¼ inch deep in seed trays or pots.
  • Keep soil moist until germination (7–14 days).
  • Transplant seedlings when they reach 4–6 inches tall, spacing 4–6 inches apart.

From Onion Sets

  • Plant small onion bulbs (sets) directly into prepared soil.
  • Space sets 4–6 inches apart in rows 12–18 inches apart.
  • Water lightly after planting.

From Transplants

  • Purchase young onion plants from nurseries.
  • Transplant into prepared garden beds with proper spacing.

Choose the planting method that fits your growing conditions, available time, and resources.


Step 5: Watering Onions

Onions require consistent moisture, especially during bulb development:

  • Frequency: Water 1–2 times per week, increasing during dry periods.
  • Method: Water at the base of the plant to keep foliage dry and prevent fungal infections.
  • Mulching: Apply organic mulch to conserve moisture, suppress weeds, and regulate soil temperature.

Proper watering ensures plump, juicy bulbs and reduces stress that can affect flavor and growth.


Step 6: Fertilizing Onions

Onions are nutrient-demanding, particularly for nitrogen:

  • Before Planting: Incorporate compost or aged manure into the soil.
  • During Growth: Apply a nitrogen-rich fertilizer every 3–4 weeks for strong foliage.
  • Balanced Nutrition: Avoid excessive nitrogen late in the season to prevent delayed bulb maturation.

Fertilization supports robust leaf growth, which in turn drives healthy bulb development.


Step 7: Thinning and Spacing

Proper thinning ensures adequate airflow and room for bulb expansion:

  • Thinning: Remove overcrowded seedlings to 4–6 inches apart once they are 2–3 inches tall.
  • Spacing: Maintain 12–18 inches between rows to allow sunlight penetration and ease of harvesting.

Thinning and spacing prevent competition, disease, and undersized bulbs.


Step 8: Controlling Pests and Diseases

Onions are relatively hardy but can be affected by:

  • Onion Thrips: Small insects that feed on leaves; manage with neem oil or insecticidal soap.
  • Fungal Diseases: Botrytis leaf blight and downy mildew; prevent by proper spacing, watering at the base, and crop rotation.
  • Onion Maggots: Larvae attack bulbs; use floating row covers to protect young plants.
  • Root Rot: Avoid waterlogged soil to prevent fungal infections.

Monitoring and preventive measures keep onion plants healthy and productive.


Step 9: Harvesting Onions

  • Timing: Harvest when the tops turn yellow and begin to fall over.
  • Method: Gently loosen soil with a garden fork and lift bulbs.
  • Curing: Dry bulbs in a warm, well-ventilated area for 2–3 weeks to extend storage life.
  • Storage: Store cured onions in mesh bags or baskets in a cool, dry place.

Harvesting at the right time ensures sweet, firm onions with long shelf life.


Step 10: Growing Onions in Containers

Onions can thrive in containers for small-space gardeners:

  • Container Size: Use a pot at least 8–10 inches deep with drainage holes.
  • Soil: Use well-draining potting soil mixed with compost.
  • Spacing: Plant 3–4 inches apart to allow bulbs to develop.
  • Watering: Keep soil consistently moist but not waterlogged.

Container-grown onions are perfect for patios, balconies, or urban gardens.


Benefits of Growing Onions at Home

  • Fresh Supply: Enjoy freshly harvested onions year-round in suitable climates.
  • Cost-Effective: Reduces dependence on store-bought onions.
  • Custom Varieties: Grow unique or heirloom varieties not easily available commercially.
  • Health Benefits: Onions boost immunity, heart health, and digestion.
  • Low Maintenance: Once established, onions are hardy and relatively easy to care for.

Homegrown onions combine nutrition, flavor, and practicality for any kitchen or garden.


Tips for Thriving Onions

  1. Choose varieties suited to your climate and daylight hours.
  2. Plant in loose, fertile, well-draining soil.
  3. Water consistently, especially during bulb formation.
  4. Fertilize with nitrogen-rich nutrients during early growth stages.
  5. Thin seedlings to prevent overcrowding and encourage larger bulbs.
  6. Monitor for pests and diseases regularly.
  7. Mulch to conserve moisture and suppress weeds.
  8. Harvest when tops begin to yellow and fall over.
  9. Cure bulbs properly before storage.
  10. Experiment with different varieties to enjoy diverse flavors and colors.

Following these practices ensures healthy, flavorful onions and maximizes yield.


Conclusion

Growing onions at home is a rewarding and practical endeavor for gardeners of all skill levels. By selecting the right variety, preparing nutrient-rich soil, providing adequate sunlight and water, and practicing proper thinning, fertilization, and pest control, you can cultivate a bountiful supply of onions right in your garden or on your balcony.

Homegrown onions offer superior flavor, nutritional benefits, and the satisfaction of harvesting fresh vegetables from your own space. With careful care and timely harvesting, onions can provide a continuous supply for your culinary creations, from everyday meals to special dishes. Start growing onions today and enjoy the unparalleled taste, health benefits, and self-sufficiency that come with home cultivation.

How to Grow and Harvest Fresh Oregano

How to Grow and Harvest Fresh Oregano

Oregano (Origanum vulgare) is one of the most popular and versatile herbs in the culinary world. Known for its aromatic leaves and robust flavor, oregano is a staple in Mediterranean, Italian, and Mexican cuisines. Beyond its culinary uses, oregano also offers medicinal benefits, including antioxidant and antimicrobial properties. Growing oregano at home ensures a steady supply of fresh leaves for cooking, herbal remedies, and even decorative purposes. With the right care and techniques, oregano can thrive both indoors and outdoors, producing abundant, flavorful foliage. This comprehensive guide explains how to grow, care for, and harvest oregano successfully.


Why Grow Oregano at Home?

Growing oregano at home offers numerous advantages:

  1. Fresh Flavor: Homegrown oregano has a stronger, fresher taste compared to store-bought dried herbs.
  2. Continuous Supply: With proper care, oregano can provide leaves year-round in suitable climates.
  3. Low Maintenance: Oregano is hardy, drought-tolerant, and easy to grow.
  4. Medicinal Uses: Supports digestion, respiratory health, and has natural antibacterial properties.
  5. Versatile: Can be used fresh, dried, or in oil infusions.
  6. Aesthetic Value: Adds greenery and fragrance to gardens, patios, or kitchen windows.

Oregano is a practical and rewarding herb for both beginner and experienced gardeners.


Choosing the Right Oregano Variety

There are several varieties of oregano, each with unique characteristics:

  • Greek Oregano (Origanum vulgare hirtum): Highly aromatic, ideal for Mediterranean dishes and sauces.
  • Italian Oregano: Robust flavor, commonly used in Italian cooking.
  • Mexican Oregano (Lippia graveolens): Strong, citrusy flavor, perfect for Mexican cuisine.
  • Golden Oregano: Ornamental variety with golden leaves, suitable for decorative purposes.
  • Cuban Oregano (Plectranthus amboinicus): Succulent leaves with a strong flavor, can be grown indoors.

Choose a variety based on your culinary preferences, growing conditions, and aesthetic goals.


Step 1: Selecting the Ideal Location

Oregano thrives in sunny, well-draining locations:

  • Sunlight: At least 6–8 hours of direct sunlight per day. Indoors, place near a south-facing window or under grow lights.
  • Air Circulation: Good airflow prevents fungal diseases and promotes healthy growth.
  • Temperature: Prefers moderate climates; protect from frost in colder regions.

A sunny, well-ventilated location ensures vigorous growth, aromatic leaves, and abundant flowers.


Step 2: Preparing the Soil

Healthy soil is essential for strong oregano plants:

  • Soil Type: Well-draining, sandy or loamy soil is ideal.
  • Soil pH: Slightly acidic to neutral (6.0–7.0).
  • Amendments: Incorporate compost or aged organic matter to enrich nutrients.
  • Drainage: Avoid waterlogged soil, which can lead to root rot.

Proper soil preparation ensures healthy roots and flavorful leaves.


Step 3: Planting Oregano

Oregano can be grown from seeds, cuttings, or transplants:

From Seeds

  • Sow seeds ¼ inch deep in seed trays or pots.
  • Keep soil moist and warm (65–70°F) for germination.
  • Transplant seedlings when they reach 2–3 inches tall, spacing 12–18 inches apart.

From Cuttings

  • Take 3–4 inch cuttings from a healthy plant.
  • Remove lower leaves and place in water or well-draining soil until roots develop.
  • Transplant rooted cuttings into pots or garden beds.

From Transplants

  • Buy young plants from nurseries or garden centers.
  • Plant in prepared soil with proper spacing.

Proper planting methods ensure strong establishment and rapid growth.


Step 4: Watering Oregano

Oregano is drought-tolerant but benefits from regular watering:

  • Frequency: Water when the top inch of soil is dry; avoid overwatering.
  • Method: Water at the base of the plant to keep foliage dry and reduce fungal risk.
  • Container Plants: Ensure pots have drainage holes to prevent waterlogging.

Consistent, moderate watering keeps oregano healthy and flavorful without promoting disease.


Step 5: Fertilizing Oregano

Oregano is a light feeder and does not require heavy fertilization:

  • Organic Fertilizers: Use compost, worm castings, or a diluted liquid fertilizer.
  • Frequency: Fertilize 2–3 times during the growing season.
  • Avoid Excess Nitrogen: Too much fertilizer can reduce flavor intensity and essential oils.

Balanced feeding ensures healthy leaves with strong aroma and taste.


Step 6: Pruning and Maintenance

Regular pruning keeps oregano compact, productive, and flavorful:

  • Pinching: Pinch back growing tips to encourage bushy growth.
  • Pruning: Trim woody stems and remove old, yellow leaves.
  • Flower Control: Remove flowers if you want leaves to remain tender and aromatic; otherwise, allow flowers to attract pollinators.

Proper pruning promotes dense foliage and prevents legginess.


Step 7: Companion Planting

Oregano can be paired with other herbs and vegetables to enhance growth:

  • Tomatoes: Oregano can repel certain pests and improve tomato flavor.
  • Basil: Both herbs thrive in sunny, well-drained locations.
  • Peppers: Oregano can deter aphids and other pests.

Companion planting maximizes garden space and reduces pest issues naturally.


Step 8: Controlling Pests and Diseases

Oregano is hardy, but some issues may arise:

  • Aphids: Spray gently with water or use insecticidal soap.
  • Spider Mites: Increase humidity and prune affected leaves.
  • Fungal Issues: Avoid overhead watering, ensure good spacing and airflow.
  • Root Rot: Prevent by planting in well-draining soil.

Early intervention maintains plant health and ensures a continuous supply of leaves.


Step 9: Harvesting Oregano

  • Timing: Begin harvesting once the plant is 4–6 inches tall.
  • Method: Cut stems just above a leaf node using scissors or garden shears.
  • Frequency: Regular harvesting encourages new growth and prevents woody stems.
  • Storage: Fresh leaves can be used immediately, stored in the refrigerator for 1–2 weeks, or dried for long-term storage.

Proper harvesting techniques ensure a productive plant and a constant supply of aromatic leaves.


Step 10: Using Fresh Oregano at Home

Oregano has numerous culinary and medicinal applications:

Culinary Uses

  • Cooking: Add fresh leaves to pasta, pizza, soups, stews, and sauces.
  • Infused Oils and Vinegars: Create flavorful oils for salads and marinades.
  • Herbal Seasoning: Dry leaves for seasoning blends or spice mixes.

Medicinal Uses

  • Antioxidant and Antimicrobial: Supports overall health and immunity.
  • Respiratory Support: Oregano tea or tincture can help relieve congestion.
  • Digestive Aid: Fresh leaves or tea can promote digestive health.

Decorative Uses

  • Container Gardening: Adds fragrance and greenery indoors.
  • Garden Borders: Oregano works as a low-growing ornamental herb.

Growing oregano at home allows you to enjoy fresh leaves for multiple purposes year-round.


Benefits of Growing Oregano

  • Easy to Grow: Hardy and low-maintenance, suitable for beginners.
  • Continuous Harvest: Regular pruning provides a steady supply of fresh leaves.
  • Flavorful: Homegrown oregano has superior taste compared to store-bought herbs.
  • Versatile Uses: Culinary, medicinal, and decorative applications.
  • Pollinator-Friendly: Flowers attract bees and other beneficial insects.

Oregano is a sustainable, rewarding herb for any home garden.


Tips for Thriving Oregano

  1. Choose a sunny, well-draining location.
  2. Plant in nutrient-rich, slightly acidic soil.
  3. Water moderately, allowing soil to dry between watering.
  4. Fertilize lightly with organic matter.
  5. Pinch and prune regularly to encourage bushy growth.
  6. Harvest leaves frequently for continuous production.
  7. Monitor for pests and remove damaged leaves.
  8. Use companion planting to naturally deter pests.
  9. Protect from frost in colder climates.
  10. Dry or freeze excess leaves for long-term use.

Following these tips ensures a productive, healthy oregano plant with aromatic, flavorful leaves.


Conclusion

Oregano is a versatile, aromatic herb that enhances both your garden and your kitchen. Growing oregano at home is simple, rewarding, and highly practical. By selecting the right variety, planting in well-draining soil, providing adequate sunlight, and practicing regular pruning and harvesting, you can enjoy fresh, flavorful oregano leaves year-round.

Whether used in cooking, herbal remedies, or for decorative purposes, oregano provides a wide array of benefits while requiring minimal care. Its hardiness, low-maintenance growth, and aromatic properties make it a must-have herb for any home gardener. Start growing oregano today and elevate your culinary creations, home remedies, and garden beauty with this timeless herb.

5 Common Garden Pests and How to Control Them

5 Common Garden Pests and How to Control Them

A thriving garden is every gardener’s dream, but even the healthiest plants can fall victim to pests. These unwelcome visitors can damage leaves, stems, roots, and fruits, reducing yields and affecting the overall health of your garden. Identifying and controlling pests early is key to maintaining a vibrant and productive garden.

In this guide, we’ll cover five of the most common garden pests and share effective, natural ways to control them—so you can keep your garden flourishing without relying heavily on chemicals.


1. Aphids

Aphids are small, soft-bodied insects that suck sap from plants. They can appear in clusters on new leaves, stems, and buds, and their feeding can stunt growth and distort leaves. Aphids also produce honeydew, a sticky substance that attracts ants and encourages fungal diseases like sooty mold.

Signs of Aphid Infestation:

  • Curling or yellowing leaves
  • Sticky residue on leaves or stems
  • Presence of tiny, pear-shaped insects in green, black, or brown

Natural Ways to Control Aphids:

  • Introduce beneficial insects: Ladybugs, lacewings, and hoverflies feed on aphids.
  • Neem oil spray: Acts as a natural insecticide without harming beneficial insects.
  • Water spray: A strong jet of water can knock aphids off plants.
  • Companion planting: Garlic, chives, and nasturtiums repel aphids naturally.

Tip: Regularly inspect plants for aphids, especially during the spring when they multiply rapidly.


2. Slugs and Snails

Slugs and snails are notorious for leaving holes in leaves and slimy trails. They are most active at night and thrive in damp, shaded areas. Seedlings and leafy vegetables are especially vulnerable.

Signs of Slugs and Snails:

  • Irregular holes in leaves
  • Silvery slime trails on soil or plant surfaces
  • Damaged seedlings or low-lying leaves

Natural Control Methods:

  • Hand-picking: Collect them at night with a flashlight and relocate them away from the garden.
  • Copper barriers: Slugs avoid crawling over copper surfaces.
  • Crushed eggshells or diatomaceous earth: Creates a rough surface that deters slugs.
  • Beer traps: Fill shallow containers with beer; slugs are attracted and drown.
  • Encourage predators: Frogs, toads, and ground beetles eat slugs naturally.

Tip: Reduce excessive moisture and mulch only with dry materials to limit slug-friendly habitats.


3. Cabbage Worms and Caterpillars

Cabbage worms and caterpillars are the larvae of butterflies and moths. They feed on leaves, leaving large holes and weakening plants like cabbage, broccoli, kale, and cauliflower.

Signs of Caterpillar Infestation:

  • Large irregular holes in leaves
  • Green caterpillars hiding on the underside of leaves
  • Frass (small dark droppings) around plants

Natural Control Methods:

  • Hand-picking: Remove caterpillars manually and dispose of them.
  • Floating row covers: Prevent moths from laying eggs on leaves.
  • Bacillus thuringiensis (Bt): A natural bacterial pesticide that targets caterpillars without harming beneficial insects.
  • Encourage natural predators: Birds and parasitic wasps help control caterpillar populations.

Tip: Inspect leaves regularly, especially the undersides, as eggs are often laid there.


4. Whiteflies

Whiteflies are tiny, winged insects that suck sap from plant leaves. They reproduce quickly and can weaken plants by causing yellowing and stunted growth. Whiteflies also excrete honeydew, encouraging fungal growth.

Signs of Whitefly Infestation:

  • Yellowing or wilting leaves
  • Tiny white insects flying when disturbed
  • Sticky residue on leaves

Natural Control Methods:

  • Yellow sticky traps: Attract and trap adult whiteflies.
  • Neem oil or insecticidal soap: Effective against both adults and larvae.
  • Introduce predators: Ladybugs, lacewings, and predatory wasps feed on whiteflies.
  • Reflective mulch: Confuses and deters whiteflies from landing on plants.

Tip: Whiteflies thrive in warm, sheltered conditions—good air circulation reduces infestations.


5. Spider Mites

Spider mites are tiny arachnids that feed on plant sap, causing stippling, yellowing, and leaf drop. They are most common in hot, dry conditions and can reproduce quickly, making infestations difficult to control if ignored.

Signs of Spider Mites:

  • Yellow, speckled leaves
  • Fine webbing on leaves or stems
  • Tiny moving dots visible on the undersides of leaves

Natural Control Methods:

  • Water spray: Blast the undersides of leaves with water to dislodge mites.
  • Neem oil or insecticidal soap: Effective for treating infestations.
  • Introduce predatory mites: Phytoseiulus persimilis feed on harmful spider mites.
  • Maintain humidity: Spider mites prefer dry conditions, so occasional misting helps control them.

Tip: Regular monitoring is key—spider mites are easier to control when detected early.


General Tips for Preventing Garden Pests

  1. Maintain garden hygiene: Remove dead leaves and debris that harbor pests.
  2. Rotate crops annually: Prevents pests from establishing in one area.
  3. Encourage biodiversity: Plant flowers and herbs to attract beneficial insects.
  4. Monitor regularly: Early detection prevents infestations from getting out of control.
  5. Use companion planting: Certain plants repel pests naturally (e.g., marigolds deter nematodes, garlic repels aphids).

Tip: Combining multiple preventive measures creates a strong, natural defense system against pests.


Conclusion

Garden pests are inevitable, but with knowledge and proactive strategies, you can protect your plants naturally and effectively.

  • Aphids, slugs, caterpillars, whiteflies, and spider mites are among the most common culprits in vegetable and flower gardens.
  • Each pest has specific signs, and early detection is key to preventing serious damage.
  • Natural control methods, including beneficial insects, organic sprays, barriers, and companion planting, provide safe, eco-friendly ways to keep pests at bay.

By staying vigilant and using these techniques, you can enjoy a healthy, productive garden full of beautiful plants and bountiful harvests—without relying on harsh chemicals.

How to Keep Rabbits From Eating Your Vegetables

How to Keep Rabbits From Eating Your Vegetables

Rabbits may be adorable in storybooks, but in the garden, they are notorious for causing frustration. These furry, energetic creatures love tender greens and can decimate vegetable gardens overnight. Lettuce, carrots, cabbage, and beans are all prime targets for hungry rabbits.

If you’ve ever returned from a weekend away to find chewed leaves or missing seedlings, you know how destructive rabbits can be. The good news is that with the right preventive measures, you can protect your garden naturally without harming these cute animals.

In this article, we’ll explore why rabbits invade gardens, what plants they love, and 7 practical strategies to keep them away.


Why Rabbits Target Your Vegetable Garden

Rabbits are herbivores, feeding mainly on grasses, leafy weeds, and tender vegetables. Several factors make your garden a perfect buffet for them:

  • Young, tender plants: Seedlings are soft and easy to chew.
  • Availability of food: If wild vegetation is scarce, rabbits turn to cultivated gardens.
  • Safety and shelter: Dense shrubs or fences provide cover for rabbits to feel safe while feeding.

Understanding their habits is the first step in preventing them from turning your garden into a rabbit buffet.


Signs of Rabbit Damage

Before implementing solutions, it’s helpful to identify rabbit activity in your garden. Common signs include:

  • Chewed leaves and stems: Typically neat cuts, unlike irregular damage from other pests.
  • Missing seedlings: Young plants uprooted entirely.
  • Droppings: Small, round, dark pellets scattered near feeding sites.
  • Runways: Narrow trails through grass or garden beds.

Once you’ve confirmed rabbits are the culprits, you can take effective measures to protect your plants.


1. Physical Barriers: Fences and Covers

The most effective method to keep rabbits out of your vegetable garden is a physical barrier. A well-constructed fence can prevent almost all unwanted visitors.

How to Build a Rabbit-Proof Fence:

  • Use chicken wire or hardware cloth with openings no larger than 1 inch.
  • Make the fence 2–3 feet high, as rabbits can jump short distances.
  • Bury the bottom 6–10 inches underground or bend it outward in an “L” shape to prevent burrowing.
  • Check for gaps regularly, as rabbits can squeeze through tiny openings.

Additional Protection:

  • Row covers or netting can protect individual plants, especially seedlings.
  • Floating row covers allow sunlight and water in but keep rabbits out.

Tip: Combine fences and row covers for extra protection during peak rabbit seasons (spring and early summer).


2. Plant Rabbit-Resistant Vegetables and Herbs

Rabbits have preferences, and not all vegetables are equally appealing to them. Planting rabbit-resistant crops can reduce damage naturally.

Vegetables Less Attractive to Rabbits:

  • Onions and garlic
  • Leeks and chives
  • Hot peppers
  • Tomatoes (especially with thick leaves)

Herbs That Deter Rabbits:

  • Rosemary
  • Sage
  • Thyme
  • Lavender
  • Mint

Tip: Surround vulnerable crops like lettuce or cabbage with herbs that rabbits dislike—this acts as a natural repellent barrier.


3. Natural Repellents

You can use homemade or commercial repellents to make your garden unappealing to rabbits. These products work by creating unpleasant tastes or smells.

Popular Natural Repellents:

  • Blood meal or bone meal: Sprinkle around the base of plants; rabbits dislike the smell.
  • Garlic and hot pepper spray: Blend garlic, chili, and water, then spray on leaves.
  • Predator scents: Urine or fur from dogs, foxes, or coyotes can scare rabbits away.
  • Commercial organic repellents: Many are safe for plants and pets and are applied as sprays or granules.

Tip: Reapply repellents after rain, as moisture can wash them away.


4. Encourage Natural Predators

Rabbits have natural enemies in the wild. By encouraging these predators, you can reduce rabbit activity in your garden naturally.

Helpful Predators Include:

  • Hawks, owls, and other birds of prey
  • Snakes (non-venomous garden-friendly species)
  • Dogs and cats (supervised outdoor activity)

Tip: Installing a perch or nest box for birds of prey near your garden can discourage rabbits from lingering.


5. Garden Layout and Maintenance

A well-planned and tidy garden can make it harder for rabbits to feed and hide.

Maintenance Tips:

  • Clear tall weeds and brush where rabbits may hide.
  • Trim overgrown hedges and shrubs to reduce cover.
  • Use raised beds for vegetables—rabbits have a harder time reaching elevated plants.
  • Plant in clusters: Dense planting can make it harder for rabbits to access all leaves.

Tip: Rotate planting locations and avoid leaving unprotected young seedlings exposed.


6. Trap and Relocation (Where Legal)

In some areas, live trapping is allowed as a humane method of rabbit control. Always check local regulations before attempting this, as relocation of wild animals may be prohibited.

How to Trap Safely:

  • Use a live cage trap with bait like apples, carrots, or lettuce.
  • Place the trap near rabbit runways but hidden from view.
  • Check traps frequently to minimize stress to the animal.
  • Release the rabbit at least a mile away in an appropriate habitat, where it won’t threaten another garden.

Tip: Trapping alone won’t solve the problem long-term—combine with fencing and repellents.


7. Companion Planting

Certain plants can naturally repel rabbits when planted strategically alongside vulnerable crops.

Companion Planting Ideas:

  • Marigolds and nasturtiums near leafy greens.
  • Strong-scented herbs around vegetable borders.
  • Spicy peppers or onions interplanted with lettuce or spinach.

Companion planting can be part of a holistic approach to garden protection, adding beauty while discouraging pests.


Additional Tips for Rabbit-Free Gardens

  • Timing matters: Rabbits are most active at dawn and dusk, so observe these periods for signs of feeding.
  • Protect seedlings: Cover young plants with cloches or small cages until they are strong.
  • Remove food sources: Keep compost piles covered and avoid leaving pet food outside.
  • Use motion-activated sprinklers: These can startle rabbits and discourage repeated visits.

Conclusion

Rabbits may be persistent, but with the right strategies, you can protect your vegetable garden naturally and effectively.

  • Fencing and covers provide a strong physical barrier.
  • Planting rabbit-resistant crops and using natural repellents keeps them from nibbling on your prized vegetables.
  • Encouraging predators, proper garden maintenance, and companion planting all work together to make your garden less inviting.

By combining these methods, you can enjoy a rabbit-free garden full of healthy, vibrant vegetables—without harming the wildlife you love to watch from afar.

Why Your Zucchini Leaves Are Turning Yellow—and How to Fix It

Why Your Zucchini Leaves Are Turning Yellow—and How to Fix It

Zucchini is one of the easiest and most rewarding vegetables to grow in a home garden. With just a few plants, you can enjoy a steady supply of tender, green fruits all summer long. But what happens when your zucchini leaves start turning yellow?

Yellowing leaves are a clear sign that something isn’t right. While it may not always mean disaster, ignoring the problem can affect your plant’s growth, reduce harvests, or even kill the plant.

In this article, we’ll explore the most common reasons zucchini leaves turn yellow and give you practical solutions to fix each one—so you can get your plants back to their healthy, green glory.


1. Nutrient Deficiencies

One of the most frequent causes of yellow zucchini leaves is lack of essential nutrients. Zucchini plants are heavy feeders and need rich, well-balanced soil to thrive.

Signs of Nutrient Deficiency:

  • Nitrogen deficiency: Older leaves turn pale yellow while new growth remains green. Plants may look weak and stunted.
  • Iron deficiency: Young leaves turn yellow, but veins stay green (a condition called chlorosis).
  • Magnesium deficiency: Yellowing starts between leaf veins, giving them a mottled look.

How to Fix It:

  • Add compost or aged manure to enrich the soil.
  • Use a balanced fertilizer (10-10-10) for general feeding.
  • For nitrogen deficiency, apply a high-nitrogen fertilizer like blood meal or fish emulsion.
  • For iron deficiency, use chelated iron spray or foliar feed.
  • For magnesium, apply Epsom salt (1 tablespoon per gallon of water) as a foliar spray.

Tip: Always test your soil before applying fertilizers—over-fertilizing can create new problems.


2. Overwatering or Poor Drainage

Zucchini loves water, but too much of it can suffocate roots and cause yellow leaves. Consistently soggy soil leads to root rot and prevents roots from absorbing oxygen and nutrients.

Signs of Overwatering:

  • Leaves turn yellow starting from the bottom of the plant.
  • Soil feels constantly wet or muddy.
  • Roots may appear dark and mushy if inspected.

How to Fix It:

  • Water deeply but less often, allowing soil to dry slightly between watering.
  • Ensure soil drains well—add sand, compost, or organic matter to improve drainage.
  • Grow zucchini in raised beds or containers if your garden soil stays waterlogged.
  • Avoid watering late in the evening to reduce prolonged moisture around roots.

Tip: Stick your finger 2 inches into the soil—if it feels dry, it’s time to water.


3. Underwatering and Heat Stress

On the flip side, not giving enough water can also lead to yellowing, especially during hot summer days. Zucchini plants are big drinkers and can wilt quickly in heat.

Signs of Underwatering:

  • Leaves yellow and wilt during the day but perk up at night.
  • Fruits may develop unevenly or become bitter.
  • Soil feels bone dry and crumbly.

How to Fix It:

  • Water consistently, at least 1–2 inches per week, more during heat waves.
  • Use mulch (straw, leaves, or grass clippings) around plants to retain moisture.
  • Water at the base of the plant to ensure roots absorb it properly.

Tip: In hot weather, zucchini may need daily watering to stay healthy.


4. Pests Feeding on Zucchini

Yellow leaves can also be a warning sign of pest infestations. Insects damage leaves directly or spread diseases that turn foliage yellow.

Common Zucchini Pests:

  • Aphids: Tiny green or black insects that cluster under leaves, sucking sap.
  • Squash bugs: Brown, shield-shaped insects that drain nutrients, causing leaves to yellow and wilt.
  • Spider mites: Tiny red or white dots that leave fine webbing on leaves.
  • Cucumber beetles: Small striped or spotted beetles that chew leaves and spread bacterial wilt.

How to Fix It:

  • Spray plants with neem oil or insecticidal soap weekly.
  • Encourage natural predators like ladybugs and lacewings.
  • Hand-pick larger pests like squash bugs and drop them into soapy water.
  • Use row covers early in the season to protect young plants.

Tip: Inspect the underside of leaves regularly—pests often hide there.


5. Fungal and Viral Diseases

Zucchini is prone to several plant diseases, many of which cause yellowing leaves.

Common Diseases:

  • Powdery mildew: White powdery spots appear first, followed by yellowing and browning.
  • Downy mildew: Yellow patches on upper leaves with fuzzy growth underneath.
  • Fusarium wilt: Starts with yellowing of one leaf, eventually spreading to the whole plant.
  • Zucchini yellow mosaic virus: Leaves show yellow mottling, distorted shapes, and stunted growth.

How to Fix It:

  • Remove infected leaves to prevent spread.
  • Improve air circulation by spacing and pruning plants.
  • Water at the soil level—avoid wetting leaves.
  • Apply organic fungicides like sulfur or potassium bicarbonate.
  • For viral diseases, remove and destroy infected plants—there’s no cure.

Tip: Rotate crops each year to prevent soil-borne diseases.


6. Transplant Shock

If you’ve recently transplanted zucchini seedlings, they may turn yellow while adjusting to their new environment.

Signs of Transplant Shock:

  • Yellow, limp leaves soon after planting.
  • Slow growth for a week or two.

How to Fix It:

  • Keep soil consistently moist (but not soggy).
  • Protect young plants from harsh sun with shade cloth for a few days.
  • Add root boosters like seaweed extract or compost tea to encourage recovery.

Tip: Always harden off seedlings before transplanting them outdoors.


7. Environmental Stress

Sometimes, yellow leaves are caused by weather extremes or environmental factors:

  • Cold temperatures stress zucchini and cause yellowing.
  • Too much shade prevents proper photosynthesis.
  • Crowding reduces airflow and light, leading to weak, yellow foliage.

How to Fix It:

  • Plant zucchini in a sunny location (6–8 hours of sunlight daily).
  • Space plants at least 2–3 feet apart for airflow.
  • Use row covers for cold nights or sudden temperature drops.

When Yellow Leaves Are Normal

Not all yellowing is bad news. As zucchini plants mature, it’s natural for older, bottom leaves to turn yellow and die off. The plant focuses its energy on producing new leaves, flowers, and fruit.

Simply trim off old yellow leaves to keep the plant tidy and improve airflow.


Conclusion

Yellow zucchini leaves may look alarming, but in most cases, the problem is fixable once you identify the cause.

  • If the issue is nutrient deficiency, adjust feeding.
  • If it’s watering-related, improve your schedule and drainage.
  • If pests or diseases are to blame, take quick action with natural remedies.
  • And if it’s just natural aging, a little pruning is all you need.

By paying close attention to your plants and responding early, you can keep your zucchini thriving all season long—and enjoy a bumper harvest of fresh, healthy squash.

How to Prevent Powdery Mildew on Your Plants

How to Prevent Powdery Mildew on Your Plants

If you’ve ever noticed a white, powdery coating on the leaves of your plants, you’ve likely encountered powdery mildew—one of the most common fungal diseases in gardens and landscapes. While it rarely kills plants outright, it can stunt growth, reduce yields, weaken flowers, and leave plants looking unsightly.

The good news? Powdery mildew is highly preventable with the right techniques. By understanding what causes it and taking proactive steps, you can keep your plants healthy, vibrant, and mildew-free.

In this guide, we’ll cover everything you need to know to prevent powdery mildew, including causes, early signs, prevention strategies, and natural remedies.


What Is Powdery Mildew?

Powdery mildew is a fungal disease caused by several species of fungi (such as Erysiphe or Oidium). It appears as a soft, white or gray powder on leaves, stems, and sometimes flowers or fruit.

Unlike many other fungal diseases, powdery mildew doesn’t require wet conditions to spread—it thrives in warm, dry days followed by humid nights. This makes it especially tricky for gardeners.

Common Host Plants:

  • Vegetables: cucumbers, squash, tomatoes, peas
  • Fruits: grapes, apples, strawberries
  • Ornamentals: roses, lilacs, zinnias
  • Herbs: basil, parsley

Why Is Powdery Mildew a Problem?

While powdery mildew doesn’t usually kill mature plants, it can:

  • Reduce photosynthesis by covering leaves in white fungal growth.
  • Stunt plant growth and weaken resistance to other pests and diseases.
  • Decrease harvests in fruits and vegetables.
  • Spoil ornamental appeal by making leaves look dull and unhealthy.

For young seedlings and delicate plants, powdery mildew can be devastating. That’s why prevention is always better than cure.


Early Signs of Powdery Mildew

Catching mildew early is critical. Watch for these symptoms:

  • White or gray powdery spots on leaves, stems, or buds.
  • Distorted or yellowing leaves.
  • Slowed plant growth.
  • Leaves dropping prematurely.

If you notice even a small patch, act quickly to prevent the disease from spreading.


5 Proven Ways to Prevent Powdery Mildew

1. Choose Resistant Plant Varieties

Some plant cultivars are naturally resistant to powdery mildew. When planning your garden, choose varieties that specifically mention “powdery mildew resistance” on seed packets or labels.

Examples:

  • Powdery mildew-resistant cucumber varieties like ‘Marketmore 76’ or ‘Dasher II’.
  • Disease-resistant grape cultivars such as ‘Chardonnay Musqué’.
  • Resistant zucchini types like ‘Dunja F1’.

Tip: Even resistant varieties may get mildew under severe conditions, but they’ll suffer less damage overall.


2. Improve Air Circulation

Powdery mildew thrives in still, humid air. Good airflow reduces humidity around plants and prevents fungal spores from settling.

How to Improve Air Circulation:

  • Space plants properly to avoid overcrowding.
  • Prune back dense foliage, especially on shrubs and vines.
  • Use trellises or supports to keep plants upright.
  • Avoid planting in tight corners or poorly ventilated areas.

Tip: Air circulation is especially important in greenhouses—install fans if needed.


3. Manage Watering Practices

Although powdery mildew doesn’t require water to spread, improper watering can make plants more vulnerable.

Smart Watering Techniques:

  • Water at the soil level using drip irrigation or a soaker hose—avoid wetting the foliage.
  • Water early in the day, giving leaves time to dry before nighttime humidity sets in.
  • Avoid overwatering, which stresses plants and encourages fungal growth.

Tip: Mulching with organic material helps retain soil moisture without increasing humidity around leaves.


4. Maintain Plant Health with Proper Care

Healthy plants are naturally more resistant to diseases. Stress, poor nutrition, or weak soil health make plants prime targets for powdery mildew.

Best Practices for Plant Health:

  • Fertilize wisely: Avoid excessive nitrogen, which promotes soft, mildew-prone growth. Use balanced fertilizers with phosphorus and potassium.
  • Rotate crops: Don’t plant the same susceptible crops (like cucumbers or squash) in the same spot year after year.
  • Remove infected debris: Clean up fallen leaves and plant debris at the end of the season to eliminate overwintering spores.
  • Sanitize tools: Disinfect pruners and stakes to prevent fungal spread.

Tip: Compost only healthy plant matter—infected leaves may reintroduce spores into the soil.


5. Apply Natural Preventive Sprays

Preventive sprays can act as a shield, keeping spores from taking hold. Several organic and eco-friendly solutions are highly effective against powdery mildew.

Natural Sprays That Work:

  • Neem oil: A natural antifungal that protects and treats plants. Dilute according to instructions and spray every 7–10 days.
  • Milk spray: Mix 1 part milk with 9 parts water and spray on leaves. Proteins in milk create an environment hostile to fungi.
  • Baking soda spray: Combine 1 tablespoon baking soda, ½ teaspoon liquid soap, and 1 gallon of water. Spray weekly to alter leaf surface pH.
  • Potassium bicarbonate: More effective than baking soda, this natural fungicide kills mildew spores on contact.

Tip: Always test sprays on a small section of your plant before full application to avoid leaf burn.


Extra Steps for Long-Term Prevention

Beyond the five main strategies, here are additional ways to stay ahead of powdery mildew:

  • Plant in full sun: Fungal spores struggle in direct sunlight.
  • Avoid overhead watering: It increases leaf humidity, creating ideal mildew conditions.
  • Harvest regularly: For crops like cucumbers and squash, frequent harvesting reduces leaf density.
  • Use organic mulch: Straw, wood chips, or compost reduce splash-up of spores from the soil.
  • Inspect weekly: Regular monitoring helps catch mildew before it spreads.

What to Do If Powdery Mildew Appears

Even with the best prevention, mildew may occasionally sneak in. Here’s how to respond quickly:

  1. Remove infected leaves immediately to stop the spread.
  2. Improve airflow by thinning plants or pruning back growth.
  3. Apply organic fungicides like neem oil, sulfur sprays, or potassium bicarbonate.
  4. Avoid composting infected leaves—dispose of them in the trash.
  5. Strengthen plant health with proper watering and fertilization.

With swift action, you can usually control the outbreak before it harms your entire garden.


Conclusion

Powdery mildew is one of the most persistent garden challenges, but it doesn’t have to ruin your plants. By choosing resistant varieties, encouraging airflow, watering wisely, keeping plants strong, and using natural sprays, you can prevent mildew before it takes hold.

The key is consistency: prevention is not a one-time task but an ongoing part of good gardening. Healthy, well-cared-for plants are far less likely to fall victim to fungal diseases, and when they do, you’ll be prepared to act quickly.

By following these steps, your garden will stay lush, green, and thriving—without that pesky white powder creeping over your plants.

5 Natural Ways to Keep Slugs Out of Your Garden

5 Natural Ways to Keep Slugs Out of Your Garden

Slugs may be small and slimy, but they can cause enormous frustration for gardeners. These soft-bodied pests are notorious for chewing holes in leafy greens, devouring tender seedlings, and leaving behind silvery trails that make your garden look messy. If left unchecked, a slug infestation can wipe out young plants overnight, making them one of the most unwelcome visitors in any garden.

Many gardeners turn to chemical slug pellets to deal with the problem, but these often harm beneficial wildlife, pollinators, pets, and even soil health. The good news? There are plenty of natural, eco-friendly ways to keep slugs away while protecting your plants, soil, and the delicate balance of your garden’s ecosystem.

In this article, we’ll explore five effective and natural methods to deter slugs and help you maintain a thriving, healthy garden.


1. Use Barriers to Keep Slugs Away

One of the simplest and most effective natural methods is to create barriers that slugs dislike crossing. Slugs move by gliding on their slime, so they avoid rough, sharp, or dry surfaces that damage their delicate bodies.

Popular Barrier Options:

  • Crushed eggshells: Save your breakfast eggshells, crush them finely, and sprinkle them around the base of plants. The jagged edges make it uncomfortable for slugs to crawl across.
  • Diatomaceous earth: This natural powder, made from fossilized algae, feels sharp to slugs and dehydrates them on contact. Be sure to reapply after rain.
  • Copper tape or strips: When slugs touch copper, it creates a mild electric sensation that repels them. Place copper tape around raised beds, pots, or even plant stems for strong protection.
  • Wood ash or sand: These dry materials create an unpleasant surface for slugs. However, they can lose effectiveness after rain or watering.

Tip: Refresh barriers regularly, especially after wet weather, to keep them effective.


2. Encourage Natural Predators

Nature has its own pest control system—predators that love to feast on slugs. By making your garden more inviting to these helpful creatures, you can naturally reduce slug populations without lifting a finger.

Natural Slug Predators:

  • Birds: Thrushes, blackbirds, and robins are particularly fond of slugs. Install bird feeders, birdbaths, or hedges to attract them.
  • Frogs and toads: If you have a small pond, these amphibians will happily keep slug numbers in check.
  • Hedgehogs: In many regions, hedgehogs are excellent slug hunters. Leaving a small wild patch or hedgehog house encourages them to visit.
  • Beetles: Ground beetles are natural slug predators. Provide them with shelter, like logs or mulch, to thrive in your garden.

Tip: Avoid chemical pesticides, as these harm the very predators that can keep slugs in balance.


3. Water Smartly: Control Moisture Levels

Slugs thrive in damp, moist conditions. That’s why you often see them most active after rainfall, at night, or in shady, wet areas of the garden. Adjusting your watering practices can make your garden less welcoming to them.

Slug-Deterring Watering Habits:

  • Water in the morning: This gives soil and plant surfaces time to dry out before nightfall when slugs are most active.
  • Avoid overwatering: Keep the soil moist enough for plants but not soggy.
  • Improve drainage: Raised beds, compost, and well-aerated soil reduce excess moisture where slugs like to hide.

Tip: Mulching with dry materials (like straw) instead of damp organic matter can also reduce slug activity around plants.


4. Use Natural Slug Traps

Traps can help you physically remove slugs from your garden without resorting to chemicals. These methods work by attracting slugs to a specific spot, making it easy to collect and dispose of them.

Popular Natural Traps:

  • Beer traps: Slugs are attracted to the yeast in beer. Bury a small container (like a yogurt cup) in the soil, fill it halfway with beer, and slugs will crawl in and drown. Empty and refresh as needed.
  • Grapefruit or orange halves: Place hollowed citrus halves upside down in your garden. Slugs will crawl under them overnight, and you can collect them in the morning.
  • Wood boards or tiles: Lay boards or tiles on the soil. Slugs will hide beneath them during the day, making them easy to gather and remove.

Tip: Check traps regularly in the morning to prevent them from becoming unsanitary or attracting other unwanted pests.


5. Grow Slug-Resistant Plants and Companion Crops

Not all plants are equally appealing to slugs. By mixing slug-resistant plants into your garden, you can reduce the risk of severe damage. Additionally, some plants act as natural repellents.

Slug-Resistant Plants:

  • Lavender
  • Rosemary
  • Ferns
  • Geraniums
  • Hydrangeas

Companion Planting:

  • Garlic, onions, and chives: Their strong scent deters slugs. Plant them around vulnerable crops.
  • Mint and sage: Natural deterrents that slugs dislike crawling near.

Trap crops: You can also plant lettuce or marigolds as “sacrifice plants” to lure slugs away from more valuable crops. Just be prepared to monitor and remove the slugs regularly.


Additional Tips for Success

  • Hand-pick slugs at night: With a flashlight, collect them when they’re most active. Dispose of them humanely away from your garden.
  • Rotate crops annually: This disrupts slug habitats and prevents them from becoming established.
  • Keep your garden tidy: Remove weeds, debris, and dense ground cover that provide hiding spots.
  • Combine methods: No single natural method will completely eliminate slugs. The best approach is to use several strategies together.

Conclusion

Slugs may seem unstoppable, but with a little strategy and patience, you can protect your garden naturally. By using barriers, encouraging predators, managing moisture, setting traps, and planting slug-resistant crops, you create an environment where your plants thrive—and slugs think twice before moving in.

The beauty of these natural solutions is that they don’t just fight slugs; they also improve your garden’s overall health. You’ll attract beneficial wildlife, build healthier soil, and enjoy a more balanced ecosystem—all while keeping your plants safe from those slimy invaders.

If slugs have been troubling your garden, start with one or two of these natural methods today, and soon you’ll see fewer holes in your leaves and more beauty in your garden beds.